![]()

Microphone Sounds Bad? 7 Easy Fixes for Clear Audio
If your microphone sounds bad on your PC, there are several simple fixes that can quickly improve audio quality.Why your microphone sounds b
Why your microphone sounds bad
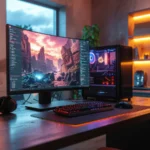
If you use a microphone on your PC, whether for voice chats in tools like Discord or Skype or for streaming, it’s possible that your voice doesn’t sound as good as it could, regardless of the type of microphone you’re using. For that reason, below we’re going to give you a series of tips so your microphone delivers the best possible sound and your voice comes through strong and clear in all the content you create.
Before we begin, we want to clarify that in this case we’re going to talk exclusively about desktop or standalone microphones. That means we’re leaving out microphones built into headsets, since there’s very little you can do to improve their sound, although some of these tips may still help slightly improve audio quality. The same applies to microphones built into webcams, since aside from their questionable quality, there’s not much that can be done to improve them. However, we do include all types of standalone microphones regardless of whether they connect via USB, XLR, or jack. With that said, let’s get started.
Hardware-related microphone solutions
As is always the case when we run into an issue with a device, there can be several solutions, so we’ll start by looking at what you can do in terms of hardware and the microphone itself. Keep in mind that we’re always referring to dedicated microphones, specifically designed to capture your voice as clearly as possible.
Check the microphone distance

The position of the microphone relative to your mouth is critical, especially for those with a hypercardioid pickup pattern or shotgun-style microphones. The best results are usually achieved when the microphone is placed at a distance of between 5 and 15 centimeters from your mouth, although the best thing you can do is test different distances to see which one gives you the best results before you start broadcasting.
Of course, if you’re streaming, it can be difficult to place the microphone at this distance without it appearing on camera and taking up a large part of the frame during the broadcast, which brings us to the second point. This will be especially relevant for those who want to do live streams on the various online streaming platforms.
Use a boom arm with a shock mount
If you place the microphone directly on your desk, all the vibrations caused by resting your hands on the desk or even typing on the keyboard will be picked up and transmitted. To avoid this, there are so-called shock mounts, which keep the microphone suspended using elastic bands so that small vibrations are completely absorbed and not picked up by the mic. They work like a kind of steady cam that absorbs movement and prevents it from being transmitted to the microphone, keeping it suspended in the same position without creating annoying noise or interference.

Using this type of mount together with a boom arm allows us to keep the microphone very close to us without it getting in the way. And if you’re streaming, it keeps the microphone out of the webcam image. You can even hang it upside down, placing it above your head so it stays out of your camera’s field of view.
Add a pop filter
You’ve probably seen a circular fabric screen placed in front of microphones many times. This device is called a pop filter, and it’s designed to filter out the popping sounds we make when opening our mouths to speak, as well as the harsh sounds produced when pronouncing certain letters like “P,” which can hit the microphone and create a very unpleasant effect.

They also reduce the wind sounds we produce when expelling air while speaking, which we’re usually not aware of. So in general, even though they may seem trivial, they’re extremely useful for improving sound clarity, especially if you’re aiming for professional studio-quality recordings and broadcasts. There’s nothing more annoying than hearing your own breathing in the middle of a recording, whether it’s live or prerecorded.
Check the microphone gain
Another thing you can do to improve your microphone’s sound quality is to check the gain. This can be adjusted directly on the microphone itself if it’s a high-end model or a USB microphone with built-in controls, on the preamp if it’s an XLR microphone, or directly through your PC’s audio settings or recording software.

Ideally, the gain level should be adjusted so that when you speak at a normal volume, the highest peaks reach no more than -12 decibels, which usually corresponds to about 75 percent of the microphone’s maximum gain. If the gain is too high, your voice will sound louder but also more distorted, making it sound unnatural and overly saturated.
Avoid background noise and echo
This is common sense: if there’s background noise and your microphone doesn’t have a noise-canceling system, that noise will creep into the recording and reduce its quality. That’s why it’s important to try to eliminate background noise and, if that’s not possible, to mitigate it using sound-absorbing materials on the walls, which also helps prevent reverberation or echo. There are even kits designed to literally surround the entire area around the microphone to prevent unwanted sounds and reflections.

Although these types of isolation panels might seem like something only professional recording studios use, there are also relatively affordable options available. They’re not as effective as professional materials, but they typically cost around ten percent of the price. You can find fairly decent kits for just over 60 euros. We fully recommend them if you plan to do this professionally. It may take some time to gradually fill your studio with foam panels, but trust us, the final result is well worth it.
Use a sound card
Many motherboards come with an integrated sound card, which saves you from having to buy an external one, but that doesn’t mean it’s good or suitable for professional recording. In fact, it’s possible that the analog-to-digital and digital-to-analog converters are damaged or of low quality, resulting in poor sound capture. Keep this in mind before trusting your recordings or live streams to a component that won’t help improve your microphone’s performance.
Our advice is to try using a sound card, whether external or internal, to check the captured sound quality. We recommend recording audio using programs like Audacity to see if any noise is being introduced and to compare recordings side by side.
Software-related solutions
Now that we’ve covered what you can do with the microphone itself, if you’re still not satisfied with the results, let’s look at what you can configure on the software side, since that can also help improve the sound. Just remember that if you’re using streaming software like OBS or Streamyard, whether locally or online, you need to make sure that the settings applied to the microphone by the software are actually being used in your broadcasts. That way, the processing we’re about to explain will make sense and be effective.
Use sound enhancement software
Another option you can try is using software designed to improve microphone audio. For example, Discord has a built-in feature that helps improve sound by eliminating background noise, which you can activate directly from the app. You need to be in a voice channel for the option to appear, and we should warn you that it often causes issues if used at the same time as microphones that have their own dedicated software.

You can also use third-party software for the same purpose. For instance, if you have an NVIDIA RTX graphics card, you can use RTX Voice. This is relatively new software that leverages the power of these graphics cards to eliminate background noise using artificial intelligence. It works by reinterpreting the sound and predicting how it would sound without elements like ambient noise or potential interference.
With these tips, you’ll almost certainly significantly improve your microphone’s sound quality, regardless of the type you’re using. However, you should also keep in mind that miracles are impossible. There will be situations where it’s simply not possible to get better performance out of your microphone for what you need. In that case, you’ll need to consider purchasing a microphone with better technical specifications, which usually means spending more money to achieve better results.
How to increase microphone volume
In addition to all the software options available for configuring a microphone, there are also the most basic settings provided by the operating system itself. Many times we forget that it may be necessary to adjust certain basic peripheral parameters. To do this, you need to access your computer’s audio management, which is very easy to do in Windows and allows you to increase the microphone’s volume and improve audio quality.

It’s worth noting that sometimes increasing the microphone volume to the maximum can cause issues related to unwanted sounds. After boosting it, you might start noticing problems such as crackling or similar artifacts. One way to increase your microphone volume is by typing “Manage input sound devices” into the Windows search bar, locating your microphone under the Input section, selecting the device you want to adjust, and then going to the Volume section to set it to your desired level.
There’s also another way to increase your microphone volume, although the previous method is the simplest. You can do it directly from the system audio icon if you don’t have Windows search enabled. To do this, right-click the system audio icon, select “Open Sound settings,” go to the Input section, choose “Device properties,” and then adjust the microphone volume from there.
Make sure your system is using the correct microphone
There are many situations where a user may have multiple microphones connected to the computer. In these cases, an application may be using the wrong one, which obviously results in poor sound quality. On laptops, for example, the system may default to using the webcam microphone instead of the one built into a headset or a typical desktop microphone, depending on what you’re using. This can make the audio quality much worse than the user expects.
The easiest way to fix this is to disable the microphone you’re not using, which prevents the operating system from selecting it in any application. To do this, you need to type “Change system sounds” into the Windows search bar, open the resulting window, go to the Recording tab, where all connected microphones will appear, and then right-click the one you want to disable and select the appropriate option.
Once you’ve done this, you’ll have removed the microphone that may have been causing problems. This means it won’t work again until you re-enable it, so if you need it later, you’ll need to remember that it was disabled. As you can imagine, this also helps prevent the operating system from selecting a headset microphone as the default. In applications like Discord, for example, you’ll only see the “Default” option and the microphones you’ve left enabled, since the disabled ones won’t appear in the selection menus at all.
If your microphone still sounds bad, it may be faulty
Throughout this guide, we’ve covered various ways to improve a microphone’s sound, but that doesn’t mean they’ll solve every possible issue. There are many factors to consider when using a microphone, including the fact that if the hardware itself is low quality, the microphone will sound noticeably worse compared to better models. While you can improve it to a certain extent using the adjustments we’ve discussed, that doesn’t mean it’s a miracle solution.
For example, if you compare the quality of a microphone built into a headset with that of a standalone device, the difference is immediately obvious just by listening, even if the built-in one is among the best on the market. In general, if you want to be heard clearly, there’s no better solution than investing in models like Yeti microphones or similar, although it’s clear that this requires a significant financial investment.
Beyond microphone quality, you also need to remember that it’s an electronic device, and as such, it can develop faults that require repair or replacement. So if it doesn’t sound good, it’s also possible that it’s damaged and not working properly. This is obviously the last thing anyone wants, which is why, as with any peripheral, you should always check where the problem lies and how serious it is, especially since it may mean you’ll need to replace it if you want your voice to sound good.
I haven’t been working in the IT industry for very long, but ever since I was a kid I knew this was what I wanted to do. I started studying and tinkering with hardware when I was around 10 years old, although I had been using computers long before that , I used my first mouse at just 3 years old.
My studies focused on computer science topics, mainly cybersecurity. Over time, I discovered how much I enjoyed sharing hardware-related news and information with others.
Like many professionals in the industry, video games were one of my main motivations for getting into tech. They’re still a big part of my daily life, and I’m always keeping an eye on the latest announcements.
I’ve been working at PerfCore for a while now as a writer, and little by little I’m gaining experience in other roles as well such as doing in-depth product reviews and developing a more critical, analytical approach to hardware.